
If you’re a rising small business owner with aspirations to get your brand online and start selling across the U.S., WooCommerce may be an option for you. If you’re already working with WordPress, this online shopping plugin will make it easy to install, configure and get straight to work! If you need custom work, you could contact a web developer to assist you with your goals. Now, let’s teach you how to add products in WooCommerce WordPress website.
WooCommerce is an opensource plugin with a multitude of options which makes it extremely flexible. Depending on how advance you are with coding, you can modify this plugin to your liking. However, if you’re a novice, don’t be overwhelmed by this simple tool. By the time you get done with this article, you will know the following basic steps.
- How to add basic data like title, description, categories and tags.
- How to add product details data like price, discounts, taxes, inventory and shipping just to name a few.
- How to optimize semantics by using YOAST SEO plugin with WooCommerce.
- How to add images and an individual product gallery, if you’d like to display different angles of an item.
Keep in mind that adding a product to a site and optimizing it for SEO are two different objectives, and the scope of work involved will also differ. If you are not looking to optimize the products for SEO, we will let you know which parts you can skip, so that you don’t spend the extra time optimizing for search engines.
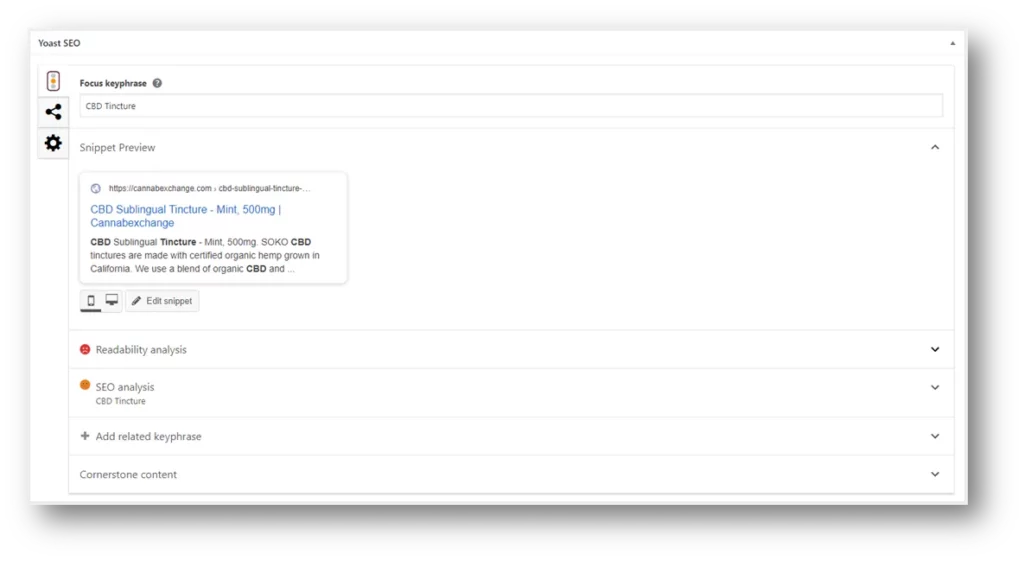
In such an instance, you can start with YOAST SEO. While the plugin needs to be installed and you will be making use of it, if you do not want to focus on SEO while initially adding the products, start by skipping the module in the image below for the product pages you are creating.
For the sake of keeping the content direct, we will leave the details and importance of implementing basic SEO methods for another article you can read at a later date. This is for implementation only.
Titles, Descriptions & Semantics
Let’s start with the basics, titles, descriptions and semantics. There are multiple areas where this type of information will be needed depending on the plugins you have installed. We will be teaching you how to optimize while uploading a product.
1. First Select a title that is SEO friendly for your product. This should be something relative to what others would search for online. You can also use a keyword planner to help you get through this portion. There’s a good one provided for free with your Google ads account.
The example we are providing in this article comes from Cannabexchange.com which was a new social & media platform for the cannabis industry. As mentioned earlier, title is added to this input segment.

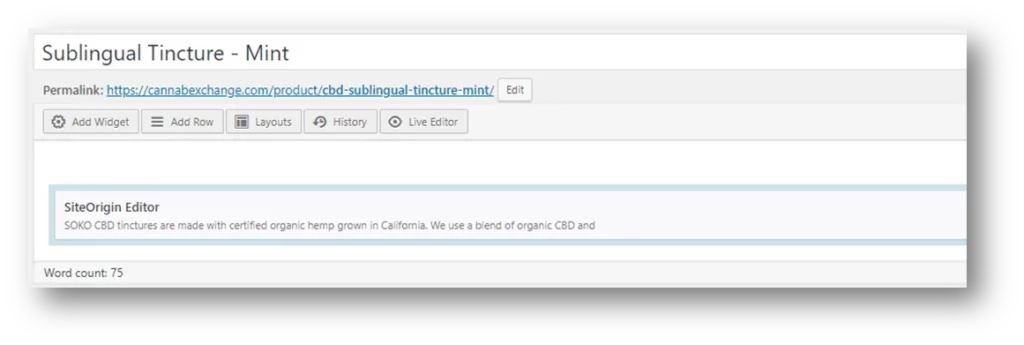
This title will also need to be added in other areas for optimization purposes. Looking at the image above, you will also see the word “Permalink”, which is the page’s permanent URL unless manually changed. Copy and paste the page title to the permalink below the title input to change the name of the page.
In the next image you will notice that this is a widget built by a third party called “Site Origin”, not all widgets are built alike, so depending on the plugin you are using for content management, your options will vary vastly. Universally however, most widget can be selected to open them. Once it’s opened, you can copy and paste the description or begin to create your description. You will need it 2 more times throughout the process before you launch the product.
Additionally, follow the images below to repeat the process in the inputs provided.
YOAST SEO Plugin Implementation
This is the Yoast SEO module and if you are not planning on optimizing your product, this segment will not be needed, or the entire plugin for that matter. For those that want to take the opportunity to optimize your semantics or meta data, while launching your products, start with the focus keyword.
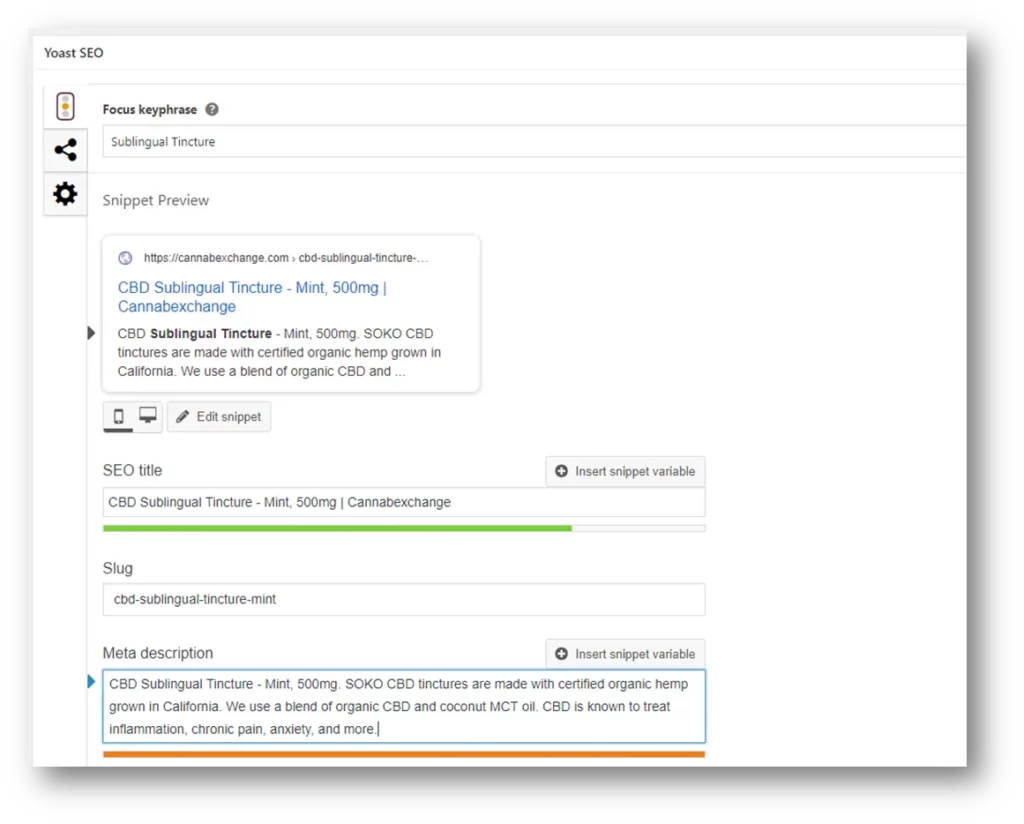
The Focus Keyword: Do not just copy and paste the full title to this input, select the most important 2 or 3 consecutive keywords in the title. In this example, you can use “Sublingual Tincture” unless you are optimizing for something completely different. Next you want to select the container with text right below the key phrase labeled “Snippet Preview”. In short, this snippet is used as an example preview of the content you are providing Google bots and what will be displayed in Google search results.
When the container opens, focus on pasting the title first to the “SEO Title input” followed by the following symbol “|” and then your brand name. An example has been provided in the image below. Do not worry about the slug, WordPress will take care of that on its own. Next, go to the description and paste the title followed by a description. Be mindful of the total character limit.
This takes care of the basic YOAST SEO semantics or meta data for this product page.
WooCommerce Product Details
This is one of the most important areas and it is also loaded with lots of options and features, so for the sake of launching this product page faster, we will only walk you through the most important areas. We will later create another update to this which will break down key segments of the product details that you need to be aware of.
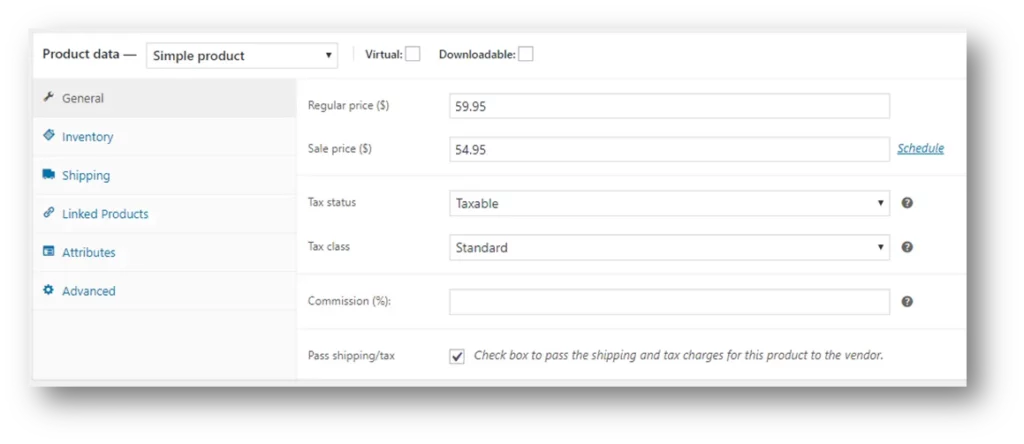
As shown in the image above, we will start showing you what to do with “Simple Product”, Product Data. Don’t worry about the dropdown menu, we will later create an article to go into details on “Variable Products” and alternative options. In simple product, you can see the tabs to the left starting with “General” data.
General Data: Here is where you add product price with a sale price below the retail price if you are providing special offers and deals. You then decide whether your product is taxable or not. For now, let’s keep it simple and say that your product is taxable, and you can leave the tax class as standard. Don’t worry about the “Commission and Pass Shipping/Tax” We’ll leave those for a more advanced article a little later.
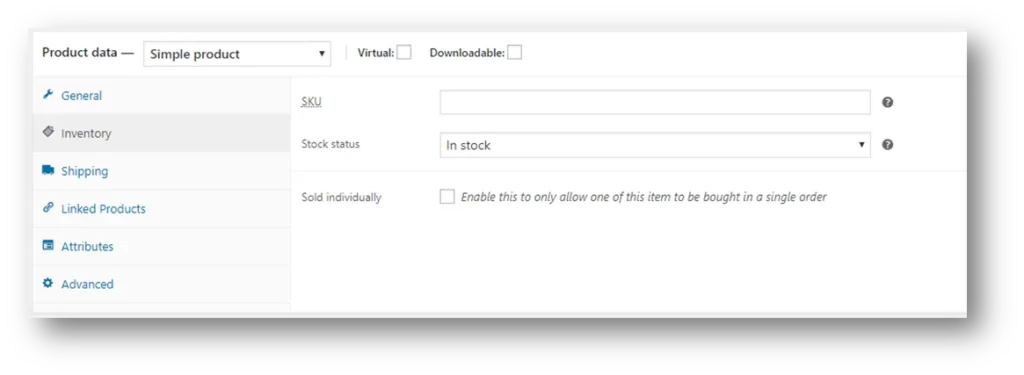
Inventory
This one is straight forward. You have your SKU, mark down whether the item is “In Stock, On Back Order or Out of Stock”, and you then check the box if this item can only be bought once per transaction. This is a good tool if you’re limited in stock for a popular item.
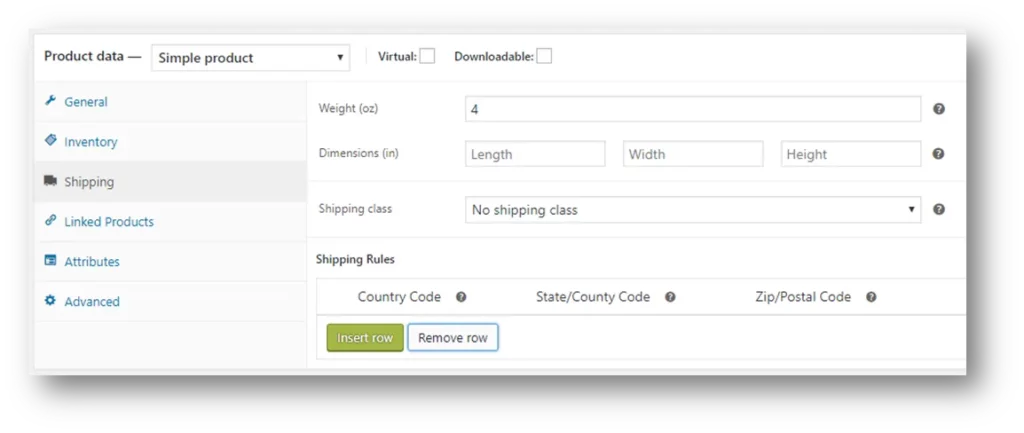
Shipping
Shipping is very important and if not done correctly, you can lose a lot of money as more and more of the shipping cost can eat into your profits. Get the proper weight of the product, the packaging dimensions and the shipping class which can help manage shipping between many products and from many buyers across the U.S.. Additionally, you can also create new shipping rules for a specified product, but we will go into further details in this subject in one of our upcoming articles.
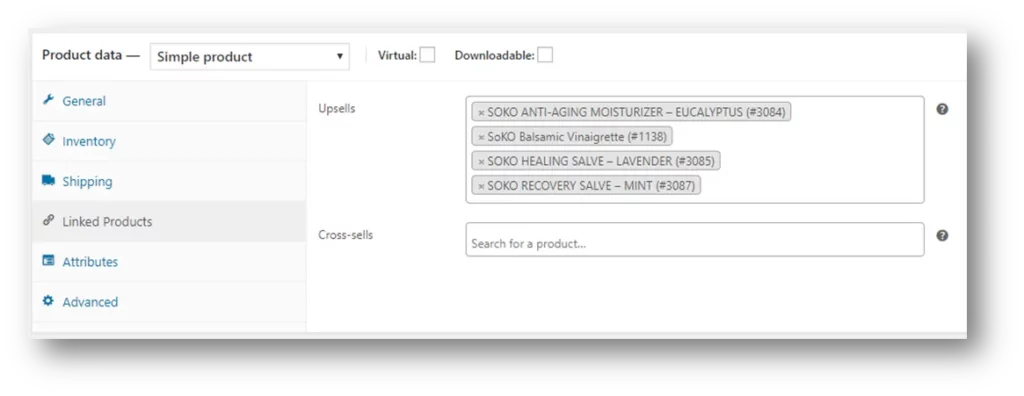
Linked Products
This option in WooCommerce is a great way to increase interest in other items you sell, increase conversions and sales. In this segment you have both Upsell and Cross-sell. Upsell can be used to provide options for some of the same products in larger sizes, but with a smaller cost per unit of measurement. Cross-sell however, can be used for complimentary products. For example, a good cross-sell item for a vape pen would be a battery pack for the vape pen. These methods help increase CRO (Conversion Rate Optimization) which will increase your overall sales, profit and progress.
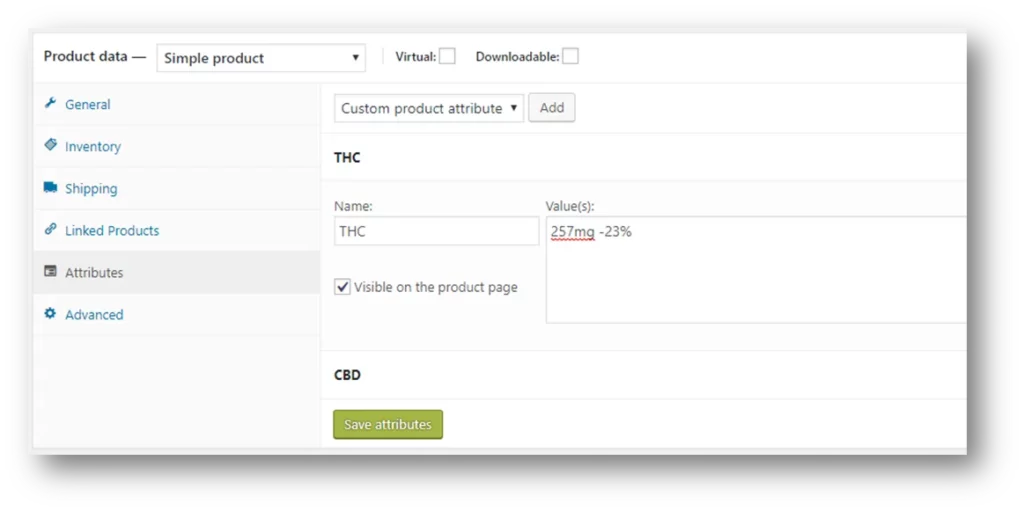
Attributes
This option is good to use for product details and specifications. If you need a good way to organize product specs and other similar data, the attribute option is the way you want to go instead of adding too much information is the description of the product. Long descriptions can exhaust a reader, it’s less organized and harder to read. Attributes is a much user-friendly way to display this type of information.
Based on whether the product listing is a simple product or a variable product, this portion of the segment can change, so we will only explain the simple product version. At the top of this segment you can see the option to add a custom product attribute. That is exactly what we did in the image above. Once you select “ADD”, an input is provided to name your attribute. In this case we called it “THC”, which will hold the data for the THC content in the product. Next to the name you will see “Value” which is where you enter the value or multiple values of this attribute. You separate each value with the “|” symbol. Then you select whether the data should be visible in the individual product page.
We will leave the advanced segment for a more in-depth article in the near future.

Short Description:
In many cases you will have an area for excerpts or short descriptions. You can simply use the description you used in the top segment of this page if you are in a hurry. Otherwise, you can embellish on the product in the first segment while providing highlights in this description container.
Sidebar Options:
In this segment, we will go to the right side of the product page in the administrative panel. The sidebar has several items we use to increase how user friendly the website is for visitors through category options and tags. If you have a brand plugin or vendor plugins, you can also access those in the sidebar. For now, let’s focus on the basics.
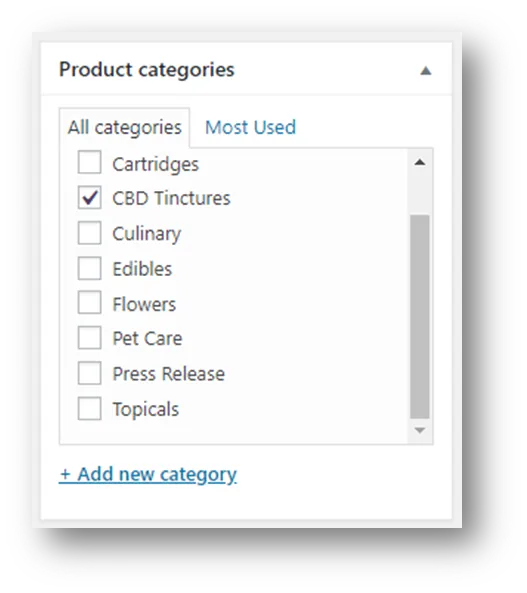
Categories:
Your categories should be a list of items that can be used by multiple products in order to display groups of items that complement each other or that have some similarities. For example, you can use the category option to create brands for different items that can be grouped. You can also use it to list the types of products instead of the brands themselves. With categories, you must stay consistent and avoid duplicate content.
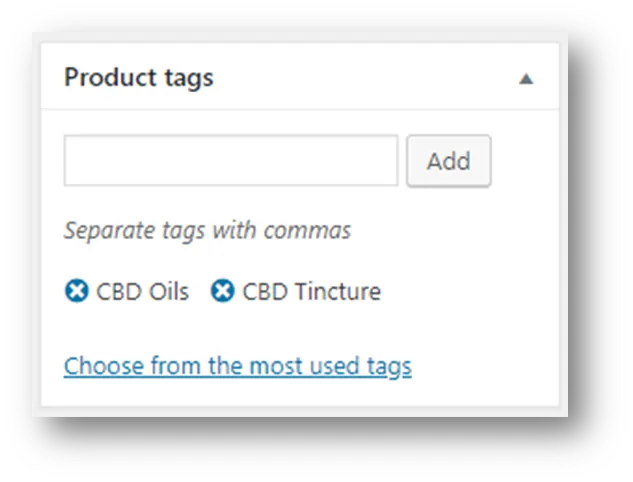
Tags:
Tags are another great way to group items together under a different classification. For example, Cartridges can be your category while the flavors of those cartridges can be the tag name. This tag name can also be used for different products that are not comparable. However, in this case it will provide a list of items to the user which all have the same flavor the individual is looking for.
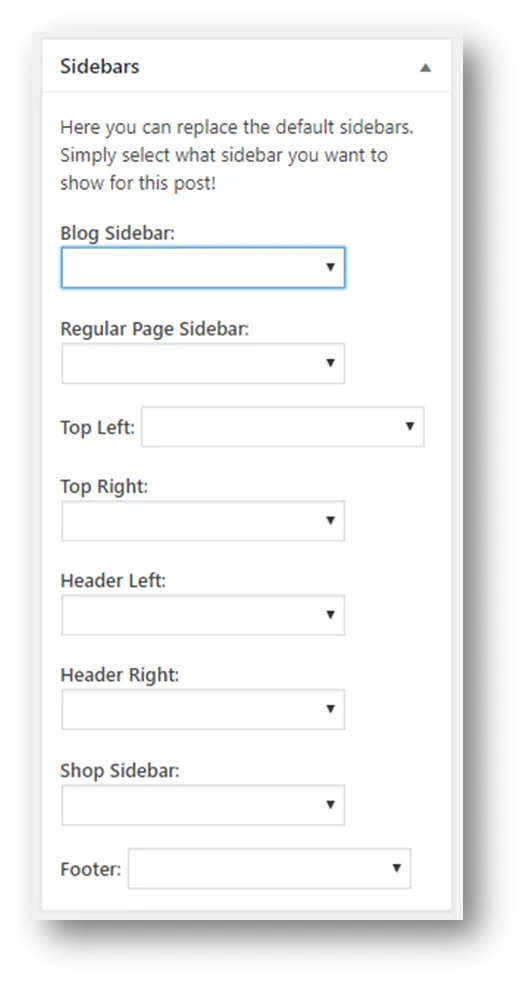
Product Page Sidebar:
Each product page can have a left or right sidebar which is a great way to highlight other products the user may be interested in. This is also a great way to display more articles for a user that are on the blog page. For now, however, let’s stay away from the blog page and stick to the products. We will teach you in a separate article, how to create a new sidebar you can use for any page across the website. You can go to the dropdown menus on this segment to see what sidebars are already available and if there are any you want to use for this page.
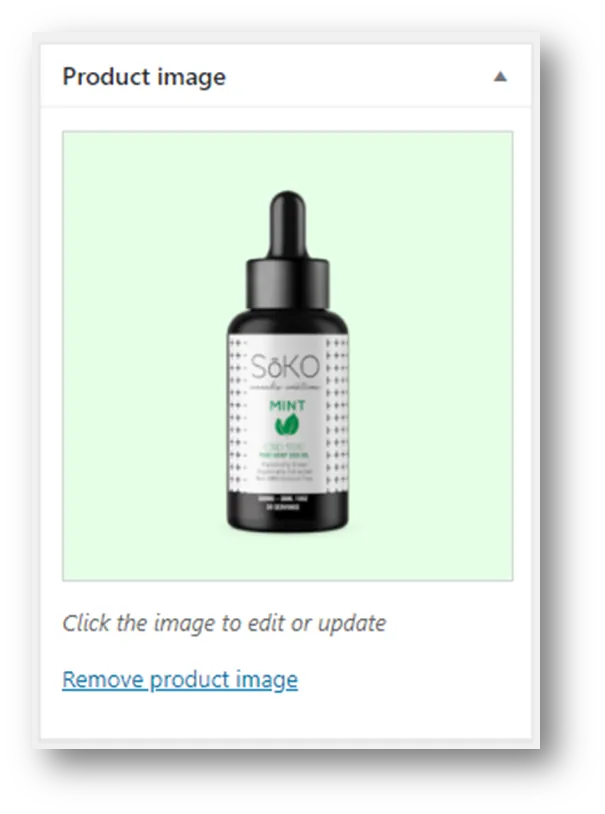
Product Image & Product Gallery:
This is where you can add a product image and in general, it is self-explanatory, but we will go through the motions with you. If there is already an image present, select the image to open the media library. If there is not image present, you can select the option to “Add Product Image” or “Add Product Gallery Images” depending on which widget you are currently working on. There are also other areas we can go into that will show you how to optimize the images but in general, make sure to provide the images an SEO friendly title, alt attribute and file name.
On to the Next One!
By this point you are done with the data entry and are ready to publish the page and move on to the next one. On the top right corner, you will see a segment called “Publish”. This is where you select the time and date if you want to post-date it. You can also “Preview” the page before publishing. Lastly, select the “UPDATE” button to submit the data and publish the page. Once the page refreshes, you will review the content you entered to make sure there are no mistakes and move on to the next item on your list.




Pingback:The Case for Pay-Per-Click Advertising in Conjunction with SEO – Cubic IT Consulting
Pingback:How to Add Products in WooCommerce WordPress Website - Layercodes Technologies
Pingback:How to Remove a User or Administrator WP | Cubic IT Consulting
Pingback:How to Add WooCommerce Variable Product | Cubic IT Consulting