
Having a well-oiled online shopping platform is what all online businesses desire. In many cases, history has proven that it can not only become a dream, but a reality. However, it doesn’t come easy, and it doesn’t happen overnight.
It takes time and effort to look at all the nuances of operating an online shopping platform. Some examples are product optimization, pricing, competitor substitutes, and their pricing, website infrastructure, and marketing strategies to name a few.
Learn the Basics of WooCommerce Simple Product Features
This article is focused on how to add a variable product to your WooCommerce online shopping website. As a result, you should be able to help provide your customers with a better shopping experience.
To keep this as efficient as possible for you, we have already added the initial steps in a previous article called “How to Add Products in a WooCommerce Website”. There, you will be able to learn the basics of how to add a title, a permalink, a description, and the featured image, as well as a few other useful features. In addition, and most importantly, you will be able to learn how to add a simple product.
Nuts and Bolts of Variable Product
We’re going to focus on the dialog box called “Product Data”. Most of our time will be spent here, so if you are just learning this for the first time, please follow the recommendations in the paragraph above.
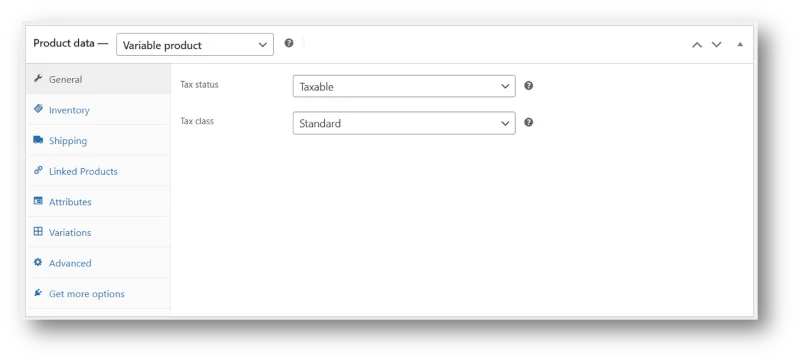
In the image below you will see the dialog box set up with simple product by default. Select the dropdown menu arrow next to the words “Simple Product”. When the menu expands, the fourth option will let you change it to “Variable Product”.

Once you’ve selected “Variable Product”, you will automatically be shown a new tab on the left-hand side called “Variations” as the image depicts below. The WooCommerce shop plugin comes fully built with all the features you’ll need to manage your business. In addition, with the right development team, you can also customize features that you may need but do not yet exist.
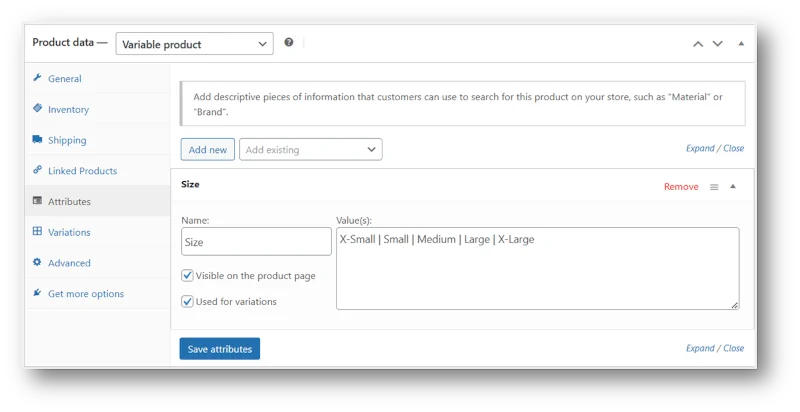
Selecting this tab will provide you with a few added options that will work together in order to turn your simple product into a variable product. For example, if you are selling t-shirts, you will want to let the user have a dropdown menu that will display different sizes and even colors for the shirt. Two areas will help you with this. First, you will need “Attributes”, which you can find on the tab just above “Variations”.
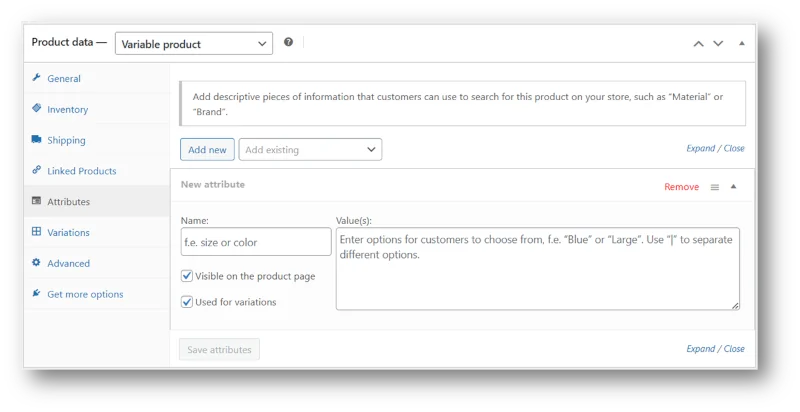
WooCommerce Variable Product Attributes
In “Attributes”, you will see the title “New Attributes” halfway down the container. On the left you have “Name” and on the right you have the “Values” for that option.
Before we go into these two options, make sure to check the two boxes labeled “Visible on the product page” and “Used for variations”. Now let’s work with the t-shirt size. Under the label “Name”, you will simply want to describe the option, such as “Size”. On the right-hand side under the label “Value(s)”, you will add the different sizes separated by the pillar key | after each size.
Let’s Dive into WooCommerce Variations
The second you go into variations; you will notice 2 buttons on the top left side of the dialog box. One on the left says, “Generate Variations” and to its right “Add Manually”.
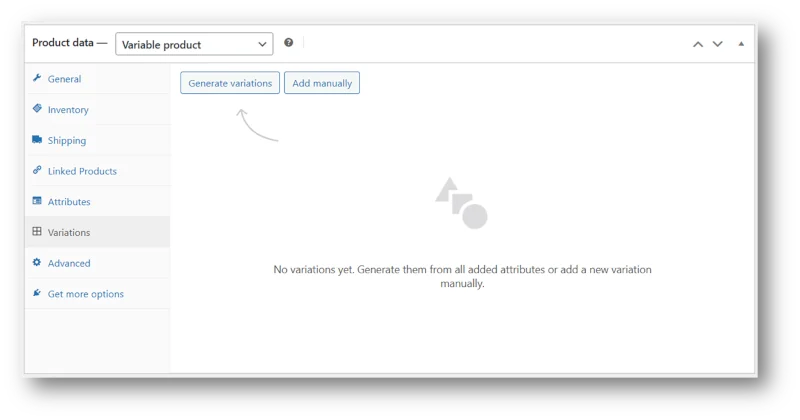
Luckily, you already added variation attributes in the previous tab, so by selecting “Generate Variations”, you can automatically populate all of the attributes you created as a variation.
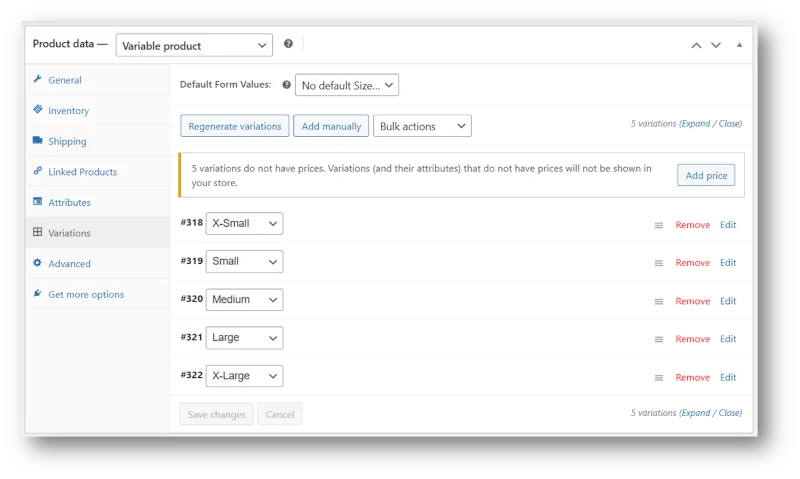
You will notice that the sizes previously added under attributes have now populated as variations of the same product. You can do this with sizes, colors, and event quantity per package.
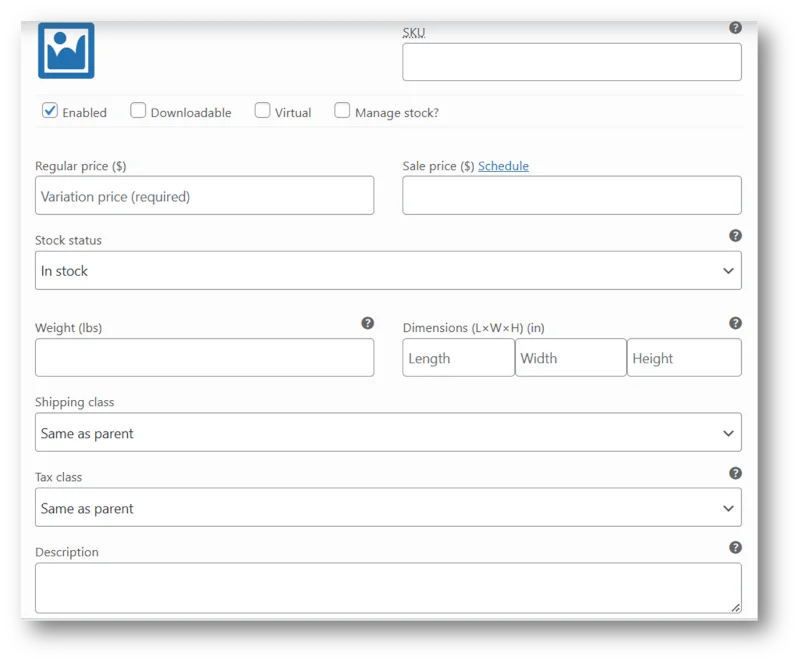
NOTE: Please remember that each variation comes with a set of its own data points. Consequently, you will need to provide those details under each variable product. Therefore, a new image, description, price, shipping, taxes, and other data points will need to be provided, if you want the product to display correctly. This also allows you to select the individual variations as primary products when you add them to upsells and cross-sells.
Once you have updated the individual variations with their own data sets, you can scroll to the bottom of the variations and select the button “Save Changes”. Now that you’ve updated both attributes and variations, you can scroll to the top right side of the product page you are editing and select the button “Update”.
Once the product edit page has reloaded, you can select the link on the top admin bar labeled “View Product”. This will take you to the front end of the website, (What your visitors see) so that you can verify the changes are displaying properly.
We hope this step-by-step guide on how to add a WooCommerce variable product will help you make your website more user-friendly for your customer.